Greetings! I'm Aneesh Sreedharan, CEO of 2Hats Logic Solutions. At 2Hats Logic Solutions, we are dedicated to providing technical expertise and resolving your concerns in the world of technology. Our blog page serves as a resource where we share insights and experiences, offering valuable perspectives on your queries.
Laravel is the most common and widely popular open-source PHP framework used for building applications and websites. Along with having Laravel as your web development framework, it helps to have a webhook for additional features
A webhook is an HTTP endpoint that receives events from Stripe. Webhooks allow you to be notified about payment events that happen in the real world outside of your payment flow.
Stripe webhooks are a powerful way to keep your Laravel application up-to-date with changes in your Stripe account. When a Stripe event occurs, such as a payment being created or a customer being updated, Stripe will send a webhook notification to your application. Your application can then listen for these notifications and take appropriate action, such as updating your database or sending an email notification to the customer.
Here we will discuss how to use Stripe webhooks for checking subscription auto-renewal.
Stripe sends notifications to your app using webhooks. Webhooks are especially important for subscriptions, where most activity occurs asynchronously.
Here are some of the benefits of integrating Stripe webhooks to Laravel:
- Real-time updates: You can keep your Laravel application up-to-date with changes in your Stripe account in real time. This means that you can always be sure that your data is accurate and up-to-date.
- Reduced workload: You can automate many tasks by responding to Stripe events. This will reduce the amount of manual work that you need to do.
- Improved customer experience: You can provide a better customer experience by sending timely notifications to customers about changes to their accounts.
Following are the steps to use Stripe Webhooks
Stripe can notify your application of events using webhooks. This package can help you handle those webhooks. Out of the box it will verify the Stripe signature of all incoming requests. All valid calls will be logged to the database. You can easily define jobs or events that should be dispatched when specific events hit your app.
Step 1: Install the package
You can install the package via composer:
| 1 | composer require spatie/laravel-stripe-webhooks |
Step 2: Publish the config files
You must publish the config file with:
| 1 | php artisan vendor:publish --provider="Spatie\StripeWebhooks\StripeWebhooksServiceProvider" |
Step 3: Publish your migrations
| 1 | php artisan vendor:publish --provider="Spatie\WebhookClient\WebhookClientServiceProvider" --tag="webhook-client-migrations" |
Step 4: Run the migration
php artisan migrate
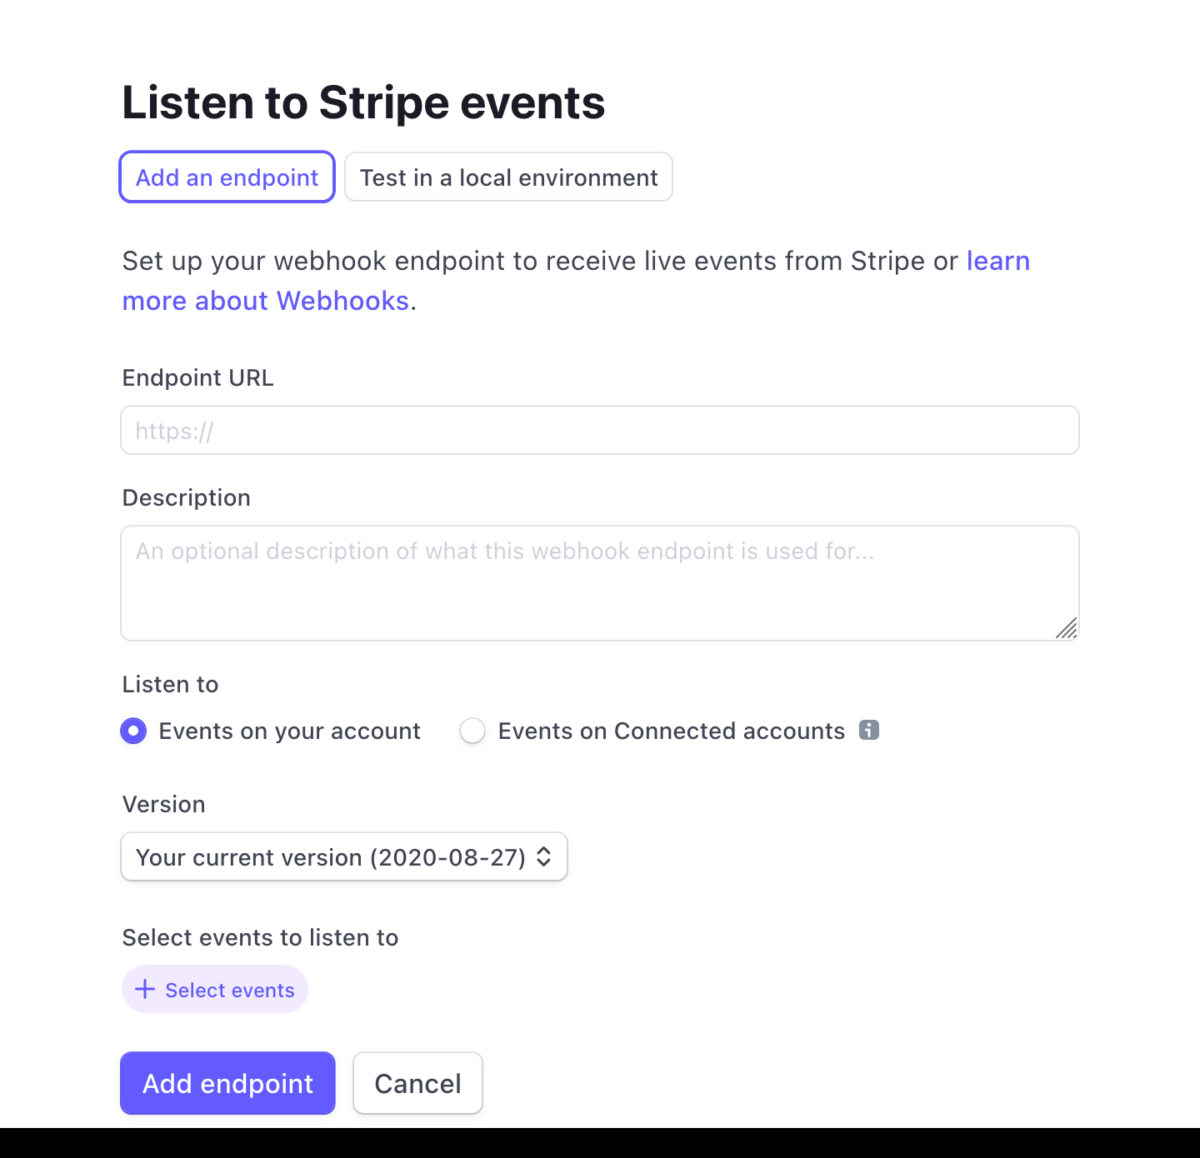
Step 5: Configure your webhook in Stripe Dashboard
The first step is to register a webhook endpoint with Stripe. This is the URL that Stripe will send webhook notifications to. You can register a webhook endpoint in the Stripe Dashboard.
Method 1: Check with actual URL
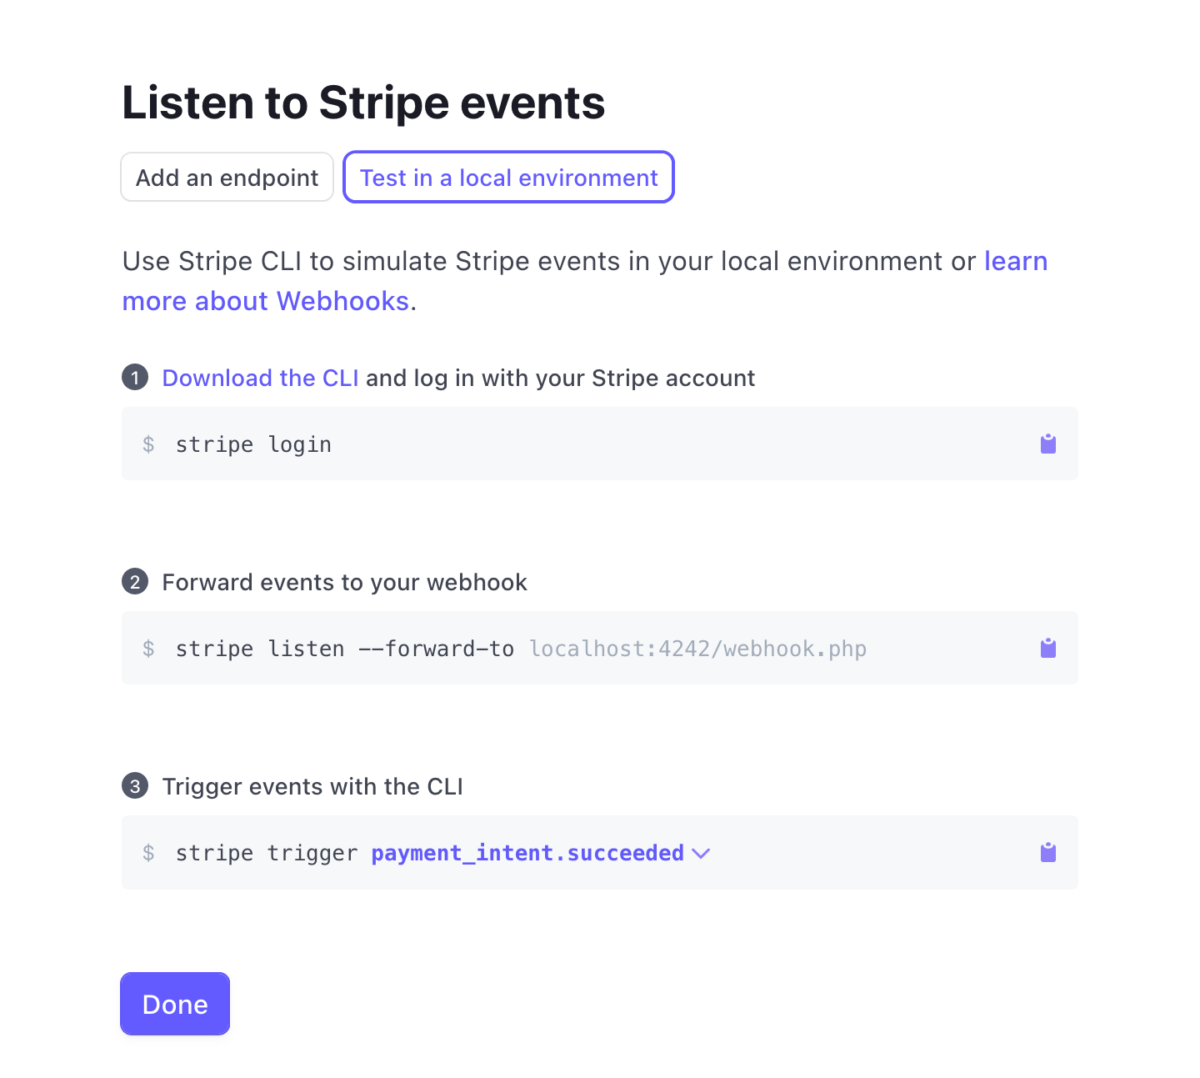
Step 5.2: check with Stripe CLI
Step 6: Configure below given values in your .env file
STRIPE_KEY=“”
STRIPE_SECRET=“”
STRIPE_WEBHOOK_SECRET=“”
Step 7: Configure your webhook URL in to routes.
| 1 | Route::stripeWebhooks('webhook-route-configured-at-the-stripe-dashboard'); |
Step 8: Disable the csrf token for url which is you configured
Stripe has no way of getting a csrf-token, you must add that route to the except array of the VerifyCsrfToken middleware:
| 1 2 3 | protected $except = [ 'webhook-route-configured-at-the-stripe-dashboard', ]; |
Step 9: Handle the requests with Jobs
| 1 2 3 4 5 6 7 8 9 10 11 12 13 14 15 16 17 18 19 20 21 22 | <?php namespace App\Jobs\StripeWebhooks; use Illuminate\Bus\Queueable; use Illuminate\Queue\SerializesModels; use Illuminate\Queue\InteractsWithQueue; use Illuminate\Contracts\Queue\ShouldQueue; use Spatie\WebhookClient\Models\WebhookCall; class HandleChargeableSource implements ShouldQueue { use InteractsWithQueue, Queueable, SerializesModels; /** @var \Spatie\WebhookClient\Models\WebhookCall */ public $webhookCall; public function __construct(WebhookCall $webhookCall) { $this->webhookCall = $webhookCall; } public function handle() { // do your work here // you can access the payload of the webhook call with `$this->webhookCall->payload` } } |
Step 10: Register you job in stripe webhook config file
| 1 2 3 4 5 | // config/stripe-webhooks.php 'jobs' => [ 'source_chargeable' => \App\Jobs\StripeWebhooks\HandleChargeableSource::class, ], |
After having created your job you must register it at the jobs array in the stripe-webhooks.php config file. The key should be the name of the stripe event type where but with the . replaced by _.
Let’s check how to run this on your local machine
You can check this also in your local system. Please follow the instructions in point 5.2.
stripe listen –forward-to localhost:4242/webhook.php
Here use your local URL instead of above like:
stripe listen –forward-to http://abc.local/stripe-webhook
Here ‘stripe-webhook’ is the configured url in routes for the stripe events.
FAQ
What is a webhook, and why is it important for handling Stripe events in Laravel?
A webhook is an HTTP endpoint that receives events from Stripe, allowing your Laravel application to be notified about payment events that occur outside of your payment flow. This is crucial for real-time updates, reduced workload, and improved customer experience, especially for subscription-related activities.
What are the benefits of integrating Stripe webhooks with Laravel for subscription auto-renewal checks?
Integrating Stripe webhooks with Laravel offers real-time updates, reduces manual work, and enhances customer experience by sending timely notifications about changes to subscription accounts.
What if I encounter issues with webhook handling or configuration?
If you encounter any issues with webhook handling or configuration, you can refer to the official Stripe documentation, Laravel documentation, or seek help from the Laravel and Stripe communities.
Can I handle multiple types of Stripe events using different Laravel Jobs within the same webhook setup?
Yes, you can handle multiple types of Stripe events by creating separate Laravel Jobs for each event type and registering them in the config/stripe-webhooks.php file under the 'jobs' array.


Related Articles