Greetings! I'm Aneesh Sreedharan, CEO of 2Hats Logic Solutions. At 2Hats Logic Solutions, we are dedicated to providing technical expertise and resolving your concerns in the world of technology. Our blog page serves as a resource where we share insights and experiences, offering valuable perspectives on your queries.
A lot of new apps are showing up in the market day by day. To get our app noticed in this wide range of apps is very difficult these days. Even if it is done, we need to make sure our users are engaged in the app by timely notifications and they must be updated with new changes in the app. Push notifications play a major role in this area.
Mobile platform provides its own service to set it up on our apps. Firebase Messaging Service (FCM) is a cross-platform messaging service from Google. This blog will show how we can set up this service in our react-native app easily.
React native firebase makes using Firebase with react native simple. It provides all firebase functionalities with simple methods. Push notifications are one of it. Different versions available for different versions of react native. We need to use ‘react native firebase’ version which matches our react native version. We can find it from the following table
| 3.3.x | 4.3.x | 5.x.x | |
| React Native | 0.50-52 | 0.52-55 | ^0.56 – ^0.57 |
| Play Services Android SDK | 11.8.0 + | 15.0.1 | ^16.0.1 |
| Firebase iOS SDK | 4.7.0 + | 5.3.0 | ^5.10.0 – ^5.11.0 |
Initially, we can start by installing the module to our project by using the following command
npm install --save react-native-firebase
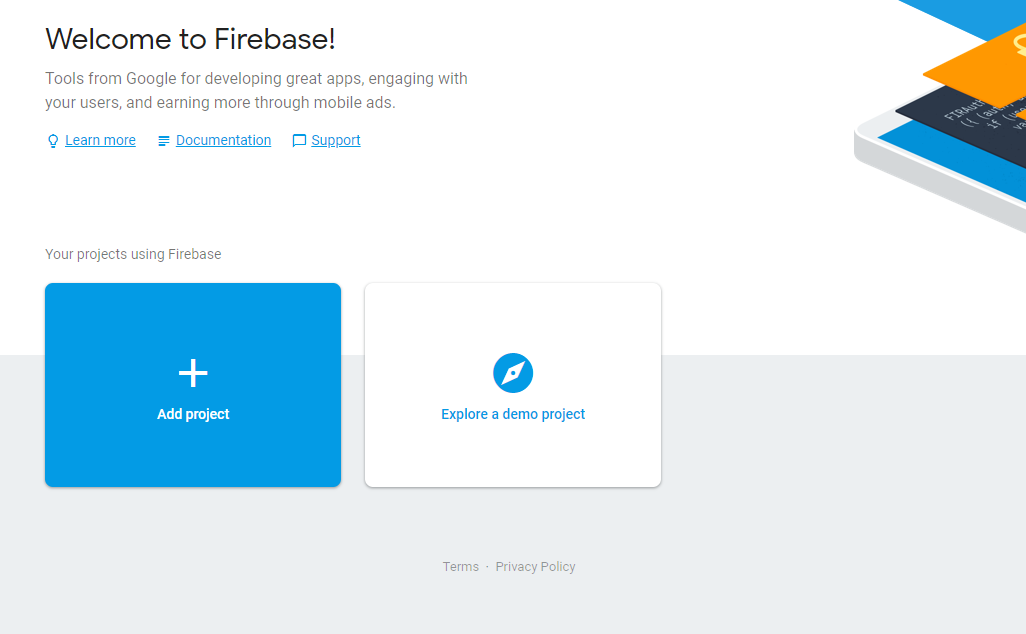
To configure the module and initialize the functionalities, we need a firebase project to set up. To do that login to firebase (https://console.firebase.google.com) using your Google account
Click the ‘add project’ button to create a new project in firebase.
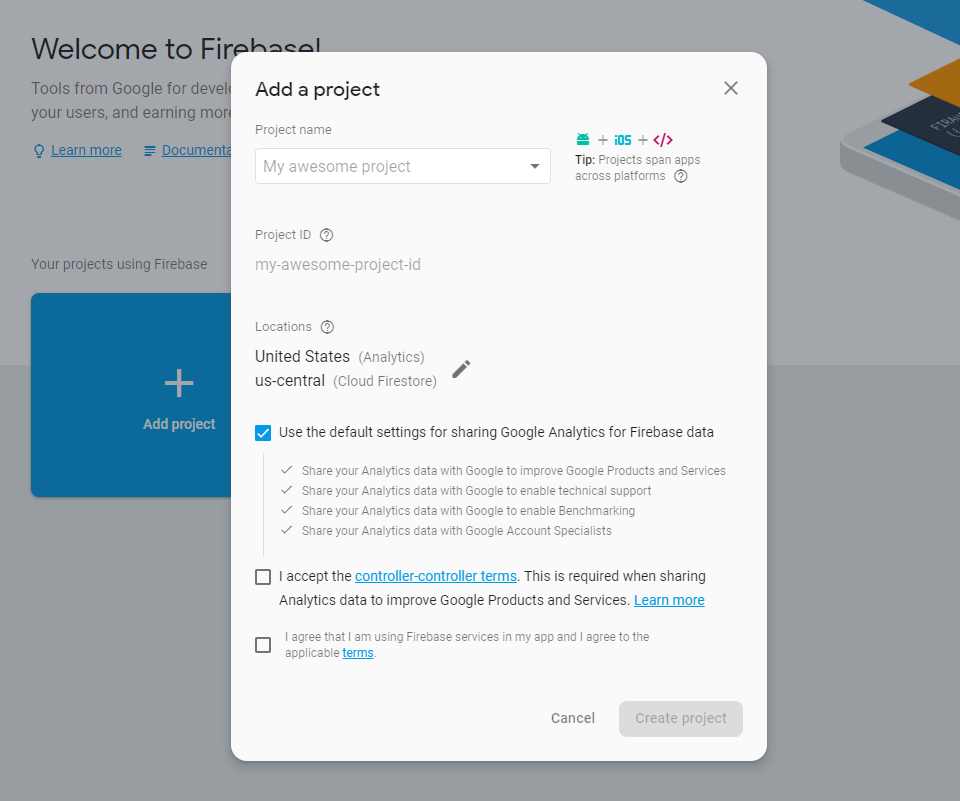
Enter the name of your project and click ‘create project’
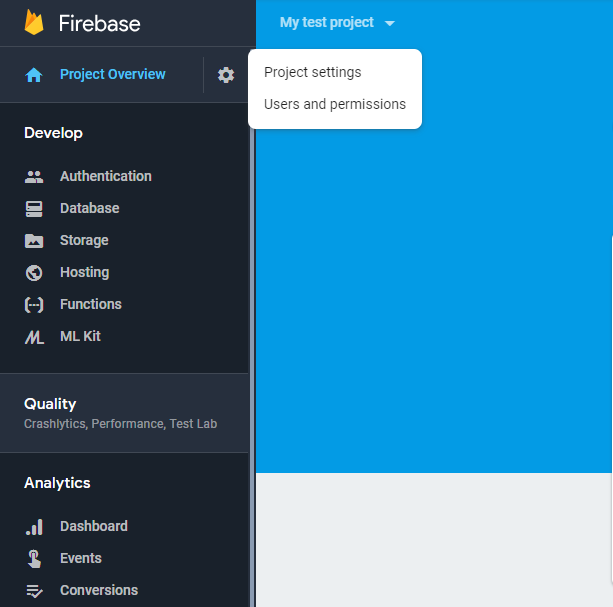
Go to project settings by clicking the gear icon next to menu called ‘project settings
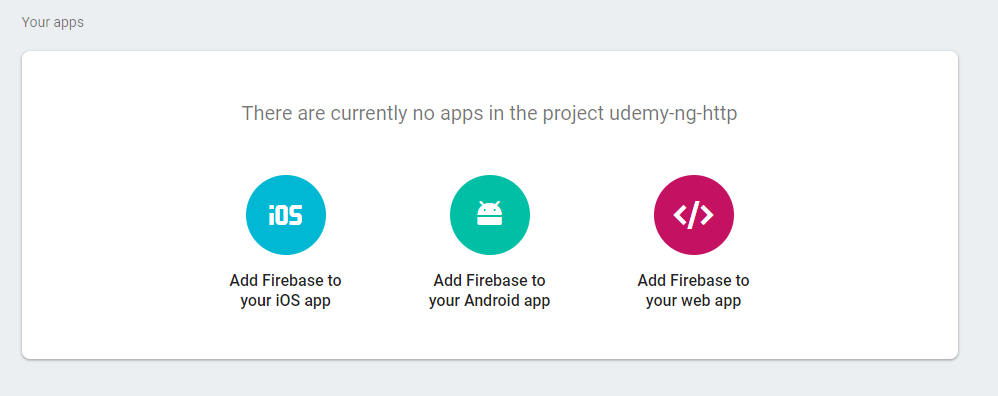
In the new window click on ‘Add Firebase to your Android app’ for Android apps.
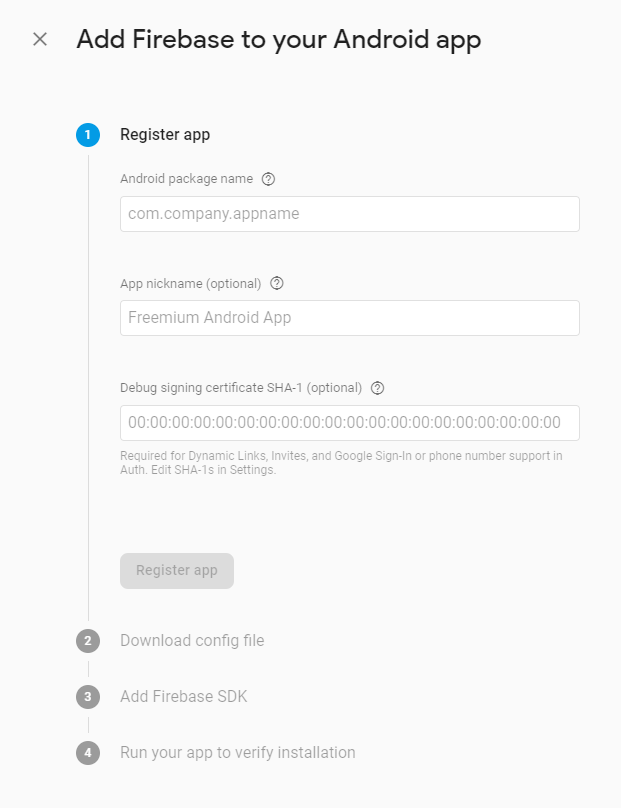
Fill out the required fields in the popup. In the form, make sure the package name you are using is the same from our project.
After clicking the ‘register app’ button you will see a button to download the configuration file as below.
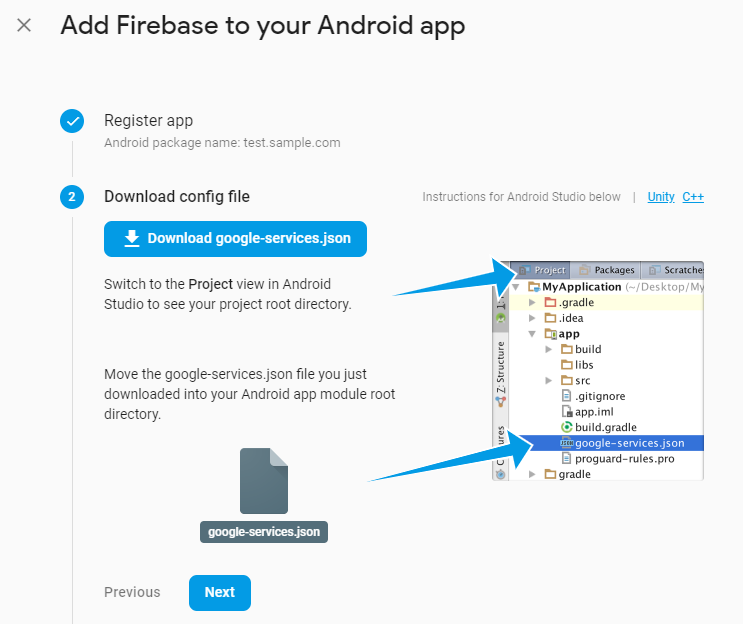
Download the ‘google-services.json’ file to the directory ‘android/app’.
Click ‘next’ and complete the process.
That is all we have to do here. We can continue with the plugin integration now.
We need to link RNFirebase to our project first. It can be done by running the following command in the root directory
react-native link react-native-firebase
Add the google-services gradle to the dependency of your project in the root level build.gradle file:Next, we need to setup google-service.json. As we already added the file to our project directory we have to add following codes to our project files.
| 1 2 3 4 5 6 7 | buildscript { // ... dependencies { // ... classpath 'com.google.gms:google-services:4.0.1' } } |
To apply the plugin to our project, we need to add the following to the bottom of the android/app/build.gradle file:
| 1 | apply plugin: 'com.google.gms.google-services' |
The Firebase modules need to be installed as project dependencies. In the android/app/build.gradle file, add the following:
| 1 2 3 4 5 6 7 | dependencies { // This should be here already implementation project(':react-native-firebase') // Firebase dependencies implementation "com.google.android.gms:play-services-base:16.0.1" implementation "com.google.firebase:firebase-core:16.0.4" |
We need to upgrade our gradle file then. For doing it android/gradle/wrapper/gradle-wrapper.properties, update the gradle URL to gradle-4.4-all.zip
And in an android/build.gradle check that you have google() above the jcenter() as follows
| 1 2 3 4 5 6 | buildscript { repositories { google() // <-- Check this line exists and is above jcenter jcenter() } } |
In android/build.gradle update Android build tools to version 3.2.0:
| 1 | classpath 'com.android.tools.build:gradle:3.2.0' |
In android/app/build.gradle update all your compile statements to be implementation, e.g.
| 1 | implementation project(':react-native-firebase') |
And finally we need to check android/build.gradle have google() above jcenter() as below
| 1 2 3 4 5 6 7 8 | allprojects { repositories { google() // <-- Add this line above jcenter jcenter() maven { } } } |
Now we need to setup ‘firebase messaging’ to enable push notification service in our app.By doing the above steps we are done with the integration of firebase to our app.
Add the Firebase Cloud Messaging dependency to android/app/build.gradle:
| 1 2 3 | dependencies { implementation "com.google.firebase:firebase-messaging:17.3.4" } |
Add the RNFirebaseMessagingPackage to your android/app/src/main/java/com/[app name]/MainApplication.java:
| 1 2 3 4 5 6 7 8 9 10 11 12 13 14 15 16 17 18 | // ... import io.invertase.firebase.RNFirebasePackage; import io.invertase.firebase.messaging.RNFirebaseMessagingPackage; // <-- Add this line public class MainApplication extends Application implements ReactApplication { // ... @Override protected List<ReactPackage> getPackages() { return Arrays.<ReactPackage>asList( new MainReactPackage(), new RNFirebasePackage(), new RNFirebaseMessagingPackage() // <-- Add this line ); } }; // ... } |
Add the following to android/app/src/main/AndroidManifest.xml:
| 1 2 3 4 5 6 7 8 9 10 11 12 | <application ...> <service android_name="io.invertase.firebase.messaging.RNFirebaseMessagingService"> <intent-filter> <action android_name="com.google.firebase.MESSAGING_EVENT" /> </intent-filter> </service> <service android_name="io.invertase.firebase.messaging.RNFirebaseInstanceIdService"> <intent-filter> <action android_name="com.google.firebase.INSTANCE_ID_EVENT"/> </intent-filter> </service> </application> |
That’s it. To run the push notification the basic functions were added to the app. Please note that push notifications only work on real devices. So, we need to run the app in the connected device using the following command
react-native run-android
Now we need to setup backend server to sent notifications. Sample PHP server side code added below.
| 1 2 3 4 5 6 7 8 9 10 11 12 13 14 15 16 17 18 19 20 21 22 23 24 25 26 27 28 29 30 31 32 33 34 35 36 37 38 39 | public function fcm($title, $message, $type, $notification_ids =array()){ define( 'API_ACCESS_KEY', 'Your_api_key'); $registrationIds = $notification_ids; $msg = array ( 'title' => $title, 'message' => $message, 'summaryText' => 'The internet is built on cat pictures', 'click_action' => 'FCM_PLUGIN_ACTIVITY', 'vibrate' => 1, 'sound' => 1, 'type' => $type ); $fields = array ( 'registration_ids' => $registrationIds, 'data' => $msg ); $headers = array ( 'Authorization: key=' . API_ACCESS_KEY, 'Content-Type: application/json' ); $ch = curl_init(); curl_setopt( $ch,CURLOPT_URL, 'https://fcm.googleapis.com/fcm/send' ); curl_setopt( $ch,CURLOPT_POST, true ); curl_setopt( $ch,CURLOPT_HTTPHEADER, $headers ); curl_setopt( $ch,CURLOPT_RETURNTRANSFER, true ); curl_setopt( $ch,CURLOPT_SSL_VERIFYPEER, false ); curl_setopt( $ch,CURLOPT_POSTFIELDS, json_encode( $fields ) ); $result = curl_exec($ch ); curl_close( $ch ); echo $result; } |
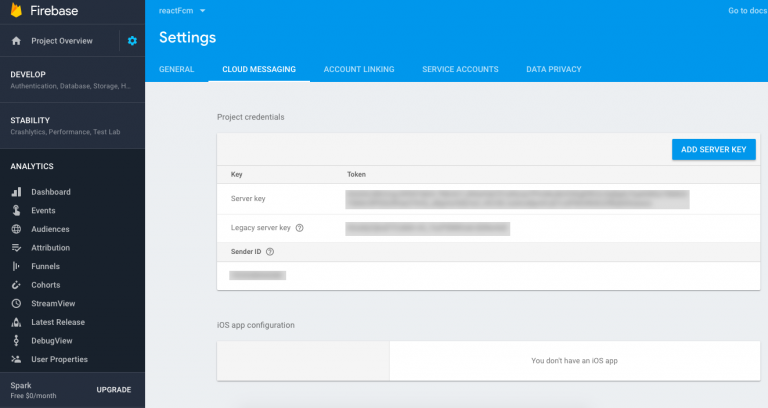
Replace ‘Your_api_key’ with ‘Legacy server key’ from firebase console – ‘cloud messaging’ tab.
$registrationIds are the token generated by the app when register to push notification.
To explore more functionalities of the module and advanced features, we can get more details from https://github.com/invertase/react-native-firebase.
Need help setting up push notifications? Contact us today. Stepping as a react native agency we look forward to more advanced solutions in the technology and explore more.


Related Articles