Greetings! I'm Aneesh Sreedharan, CEO of 2Hats Logic Solutions. At 2Hats Logic Solutions, we are dedicated to providing technical expertise and resolving your concerns in the world of technology. Our blog page serves as a resource where we share insights and experiences, offering valuable perspectives on your queries.
Quick Summary
Setting up a Shopify store is simpler than you might think. This guide walks you through the process from account creation to launch, with no technical skills required. With Shopify’s user-friendly platform, you can create an account, customize your store’s look, add products, configure payments and shipping, and be ready to sell in just a day or two. Whether you’re a solo entrepreneur or a growing brand, following these steps will help you avoid common pitfalls and set your online store up for success.
So, you want to start selling online but feel overwhelmed by all the technical stuff?
After helping dozens of businesses set up their Shopify stores, I can tell you that creating your online store doesn’t have to be complicated.
In this guide, I’ll walk you through exactly how to set up Shopify from scratch, no technical knowledge required.
Whether you’re a solo entrepreneur or a growing brand, this step-by-step process will get your store up and running quickly so you can start making sales.
What You Need Before You Start
Before diving into Shopify store setup 2025, let’s make sure you have everything in a row. Trust me, having these basics ready will make the process much smoother.
Decide Your Niche
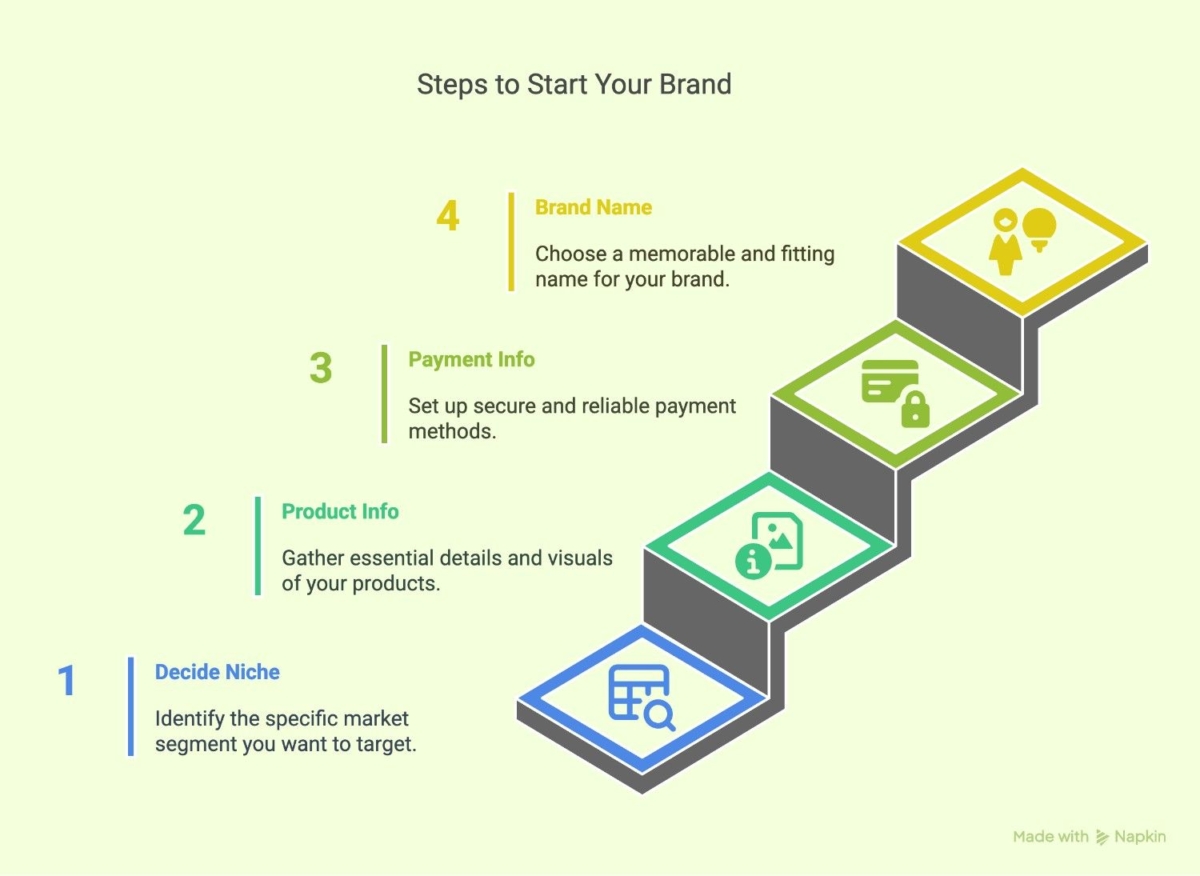
What exactly are you selling? The more specific, the better.
For example, instead of “women’s clothing,” think “sustainable loungewear for work-from-home professionals.”
Basic Product Info and Images
Have information about your products ready:
- Clear, high-quality product photos (ideally on white backgrounds)
- Detailed descriptions
- Pricing information
- Product variants (sizes, colors, etc.)
Payment Info
You’ll need:
- A business bank account
- Credit card or debit card for your Shopify subscription
- Payment processor details (if not using Shopify Payments)
A Name for Your Brand
Choose something memorable that reflects your brand and is available as a domain name.
Essential Pre-Launch Planning for Your Shopify Store
Setting up a Shopify store without proper planning often leads to costly mistakes and poor performance. The most successful store owners spend time planning strategically before diving into the technical setup.
This shopify store setup, preparation phase can mean the difference between a store that struggles and one that attracts buyers from day one.
Step 1: Choose Your Niche and Validate Your Idea
Your niche is the specific market you’ll serve. Instead of trying to sell everything to everyone, focus on a particular audience or product category.
You can choose product-based niches like eco-friendly items or tech gadgets, audience-based niches like new parents or college students, or problem-solving niches like home office solutions.
Step 2: Research Your Competition
Understanding your competitors helps you identify opportunities and avoid their mistakes. Look at stores selling similar products and analyze their price points, product positioning, and customer reviews.
Pay attention to their website design, checkout process, and how they handle product descriptions. Also examine their social media presence, advertising messages, and customer service approach.
Step 3: Develop Your Brand Identity
Your brand includes your business name, visual design, and overall customer experience. Choose a business name that’s memorable, easy to spell, and available as a domain. Check that it doesn’t conflict with existing trademarks and works across social media platforms.
Create a clear value proposition that explains what you sell, who you serve, why you’re different, and what benefit customers receive.
Step 4: Plan Your Budget and Pricing
Understanding costs upfront prevents surprises and ensures profitability. Essential monthly costs include your Shopify plan at $39/month (first 3 months for $1), domain name around $1.25/month, and basic email marketing tools.
Optional expenses include premium themes ($100-300 one-time), essential apps ($10-50/month), and advertising budget starting around $200-500/month.
Step 5: Prepare Your Content
Having content ready speeds up store creation and ensures quality. Take high-resolution product photos from multiple angles with consistent lighting and backgrounds.
Write clear product descriptions that highlight key benefits, include detailed specifications, and incorporate relevant keywords for SEO.
Prepare content for essential pages including your About Us story, shipping and return policies, and privacy policy. You can use legal templates for policies but consider consulting a lawyer for custom terms if you’re selling high-value items or have complex business requirements.
Step 6: Set Up Business Foundations
Get your business infrastructure ready before launch. Set up a professional email address, preferably with your domain name.
Create business accounts for payment processing including a business bank account and PayPal Business account.
Pre-Launch Checklist
Before moving on how to create shopify store step by step, ensure you have completed market research and niche validation. This should finalize your brand identity and content, set up necessary business accounts, and created a realistic launch timeline.
This preparation phase typically takes 1-2 weeks but saves countless hours of revisions later and positions your store for success from day one.
Once you’ve completed this planning phase, you’ll be ready to create a Shopify store with clear direction and all necessary assets prepared. The next section covers the technical process of setting up your Shopify account and building your store.
Step-by-Step: How to Set Up Shopify
Now, let’s dive into the actual process of how to create Shopify store step by step.
1. Create a Shopify Account
Starting your Shopify journey is as simple as signing up for their free trial.
First, head over to Shopify.com and click on the “Start free trial” button. You’ll need to enter:
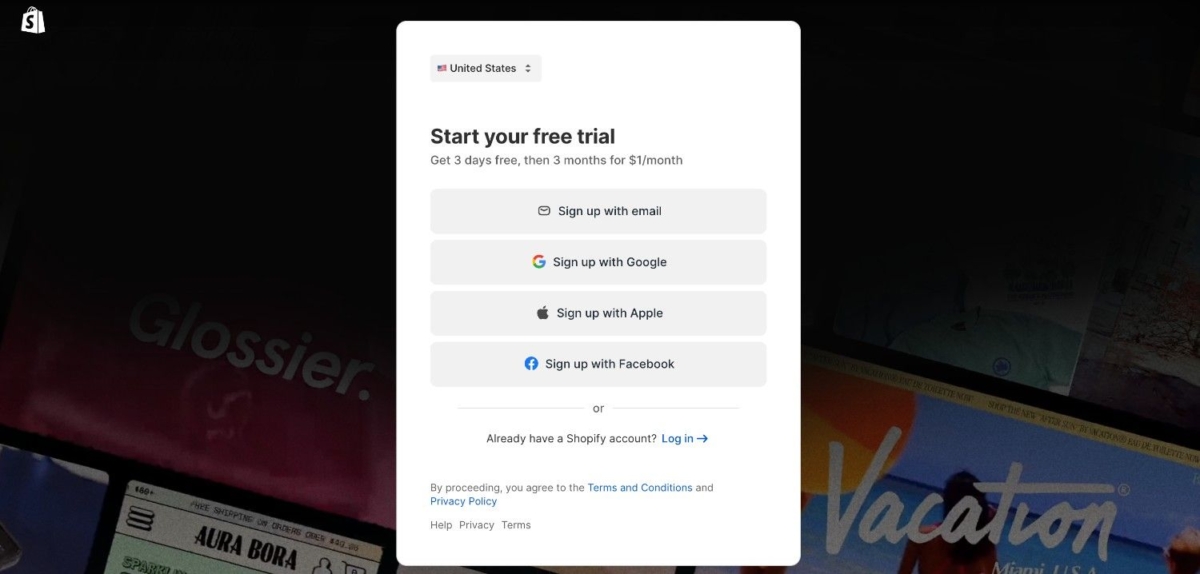
- Your email address
- A password
- Your store name
Don’t worry too much about the store name, you can change it later if needed.
The best part? Shopify offers a 14-day free trial, giving you plenty of time to set everything up before committing financially.
2. Set Store Preferences and Info
Once you’re in, Shopify will ask you some questions about your business. This helps tailor your dashboard to your specific needs.
You’ll need to provide:
- Your business address
- Phone number
- Time zone
- Default currency
- Tax settings
Be sure to set up your tax settings correctly from the beginning. For U.S. sellers, Shopify can automatically calculate sales tax. If you’re outside the U.S., check your local tax requirements.
3. Choose and Customize a Theme
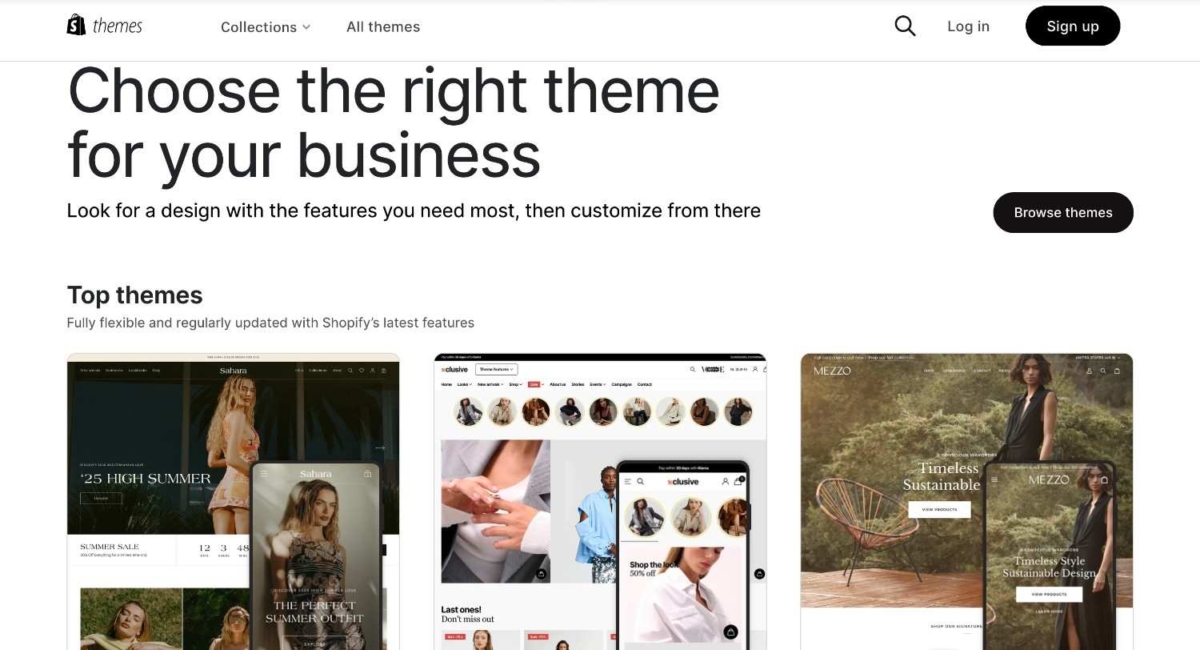
This is where your store starts to take shape visually. Choosing the right theme for setting up a Shopify website properly is crucial.
Shopify offers both free and premium themes. As a beginner, I recommend starting with a free theme like “Dawn”, it’s clean, fast, and mobile-friendly.
To select a theme:
- Go to “Online Store” → “Themes” in your Shopify dashboard
- Click “Explore free themes” or “Visit theme store” for premium options
- Choose one that matches your brand aesthetic
Once installed, you can customize:
- Logo
- Color scheme
- Typography
- Homepage layout
- Header and footer
Pro tip: Don’t get stuck in theme customization forever. Pick something clean and functional to start, you can always refine it later.
4. Add Your First Products
Now it’s time to add what you’re actually selling!
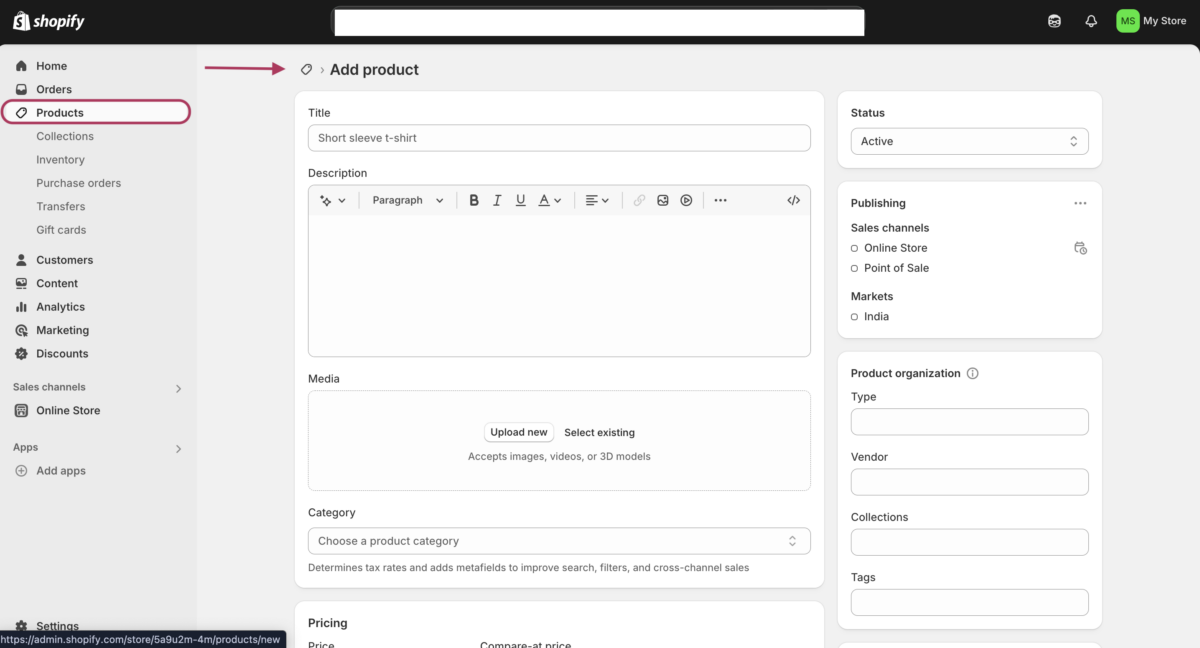
To add products:
- Go to “Products” → “Add product” in your dashboard
- Add a descriptive title (include keywords naturally)
- Write a detailed product description
- Set pricing information
- Upload high-quality images
- Configure inventory tracking
- Add product variants if needed (sizes, colors, etc.)
- Set up shipping weight and dimensions
Make sure your product titles and descriptions are both SEO-friendly and compelling to shoppers.
5. Set Up Payments
To start accepting money (the whole point, right?), you’ll need to set up payment methods.
Shopify Payments is the easiest option since it’s built-in and has the lowest transaction fees. However, it’s not available in all countries.
Other popular options include:
- PayPal
- Stripe
- Razorpay (popular in India)
- Amazon Pay
To set up payments:
- Go to “Settings” → “Payments“
- Enable your preferred payment gateways
- Complete the required information
Don’t forget to set up manual payment methods like Cash on Delivery if you plan to offer those options.
6. Set Up Shipping & Delivery
Shipping can make or break your customer experience, so set it up thoughtfully.
To configure shipping:
- Go to “Settings” → “Shipping and delivery“
- Create shipping zones (domestic, international, etc.)
- Set shipping rates for each zone
- Configure any special options like local pickup
You can offer free shipping, flat rate shipping, or calculated rates based on weight or order total.
Pro tip: Offering free shipping at a certain threshold (like $50 or $100) can increase your average order value significantly.
7. Connect Your Domain
A professional domain name builds trust with customers. You have two options:
Option 1: Buy a domain through Shopify
- Go to “Online Store” → “Domains“
- Click “Buy new domain“
- Search for your preferred name
- Complete the purchase
Option 2: Connect an existing domain
- Go to “Online Store” → “Domains“
- Click “Connect existing domain“
- Follow the instructions to update your DNS settings
When setting up a domain, make sure to also enable SSL certification (the little padlock in the browser) to secure your site. Shopify handles this automatically for you.
8. Configure Legal Pages
This step is often overlooked, but it’s crucial for protecting your business legally.
Shopify makes this easy with templates for:
- Privacy Policy
- Terms of Service
- Refund Policy
- Shipping Policy
To set these up:
- Go to “Settings” → “Legal“
- Use Shopify’s generators to create policy templates
- Review and customize for your business
- Add them to your footer menu
9. Test and Launch Your Store
Before going live, thoroughly test your store:
- Enable password protection (Online Store → Preferences)
- Share the password-protected link with friends or family
- Have them test the entire shopping experience
- Check that all payment methods work in test mode
- Verify mobile responsiveness
- Test your checkout flow yourself
When you’re ready to launch:
- Go to “Online Store” → “Preferences“
- Disable password protection
- Your store is now live!
| Feature | DIY Setup | With Professional Help |
|---|---|---|
| Time required | 1-3 days | 1-2 weeks |
| Cost | $29/month + theme | $29/month + $500-5000 setup |
| Customization | Basic | Advanced |
| SEO optimization | Self-managed | Professional |
Post-Launch Tips
Once your store is live, here’s how to set up your Shopify store for long-term success:
Essential Apps to Install
Shopify’s App Store offers powerful extensions. My recommended starter pack:
- Email marketing app (Klaviyo or Omnisend)
- SEO optimizer (SEO Booster)
- Reviews app (Judge.me or Loox)
- Upsell app (Bold Upsell)
Set Up Analytics
To track performance:
- Connect Google Analytics
- Install Facebook Pixel
- Set up Shopify Analytics reports
Optimize Navigation and Footer
Create a logical site structure with:
- Clear main menu categories
- Useful footer links (About, Contact, FAQs)
- Featured collections on your homepage
Common Setup Mistakes to Avoid

After helping dozens of merchants with how to set up Shopify, here are the pitfalls I see most often:
Skipping Mobile Testing
Over 70% of Shopify traffic comes from mobile devices. Always check how your store looks on phones and tablets.
Incomplete Product Information
Missing sizes, vague descriptions, or poor images will kill your conversion rate. Be thorough!
Not Testing Payment Gateways
Always make a test purchase yourself to ensure the entire checkout process works smoothly.
Launching Without Legal Pages
This leaves you vulnerable legally. Always have your privacy policy, terms of service, and return policy in place before launch.
Final Thoughts: Ready to Launch Your Shopify Website?
Setting up a Shopify store is remarkably accessible, even for beginners. By following this guide on how to set up Shopify, you now have all the steps needed to create a professional online store.
Remember that your first version doesn’t need to be perfect. Launch, learn from your customers, and continually improve.
The same applies to your e-commerce journey. The perfect time to start is now.
If you want to save time and ensure your store is optimized for conversions from day one, consider getting expert help. At 2HatsLogic, we specialize in setting up high-converting Shopify stores with advanced features like headless commerce integration that can dramatically increase your sales potential.
Contact us today to discuss how we can help turn your Shopify store from a basic setup into a sales-generating machine.
Have you started setting up your Shopify store yet? What part of the process seems most challenging? Let me know in the comments!


Related Articles