Greetings! I'm Aneesh Sreedharan, CEO of 2Hats Logic Solutions. At 2Hats Logic Solutions, we are dedicated to providing technical expertise and resolving your concerns in the world of technology. Our blog page serves as a resource where we share insights and experiences, offering valuable perspectives on your queries.

Once you become familiar with react-native components and start designing pretty screens, the next question is how to navigate between screens. The solution comes in the form of some navigation libraries like react-navigation, react-native-navigation or so on. I personally prefer react-native-navigation as it is more native than just a react component thus have better performance.
In this tutorial, I will walk you through the installation steps to build a basic navigation structure.
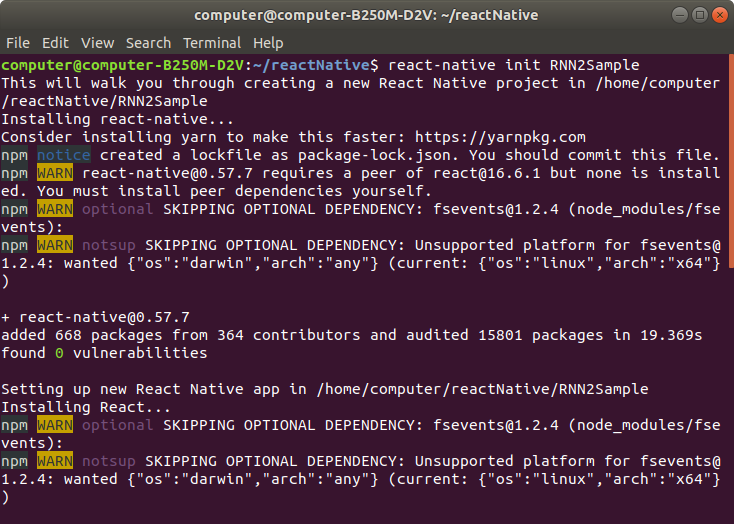
Step 1: create an app with the desired name. You can use the below command to for that:
$ react-native init ProjectName
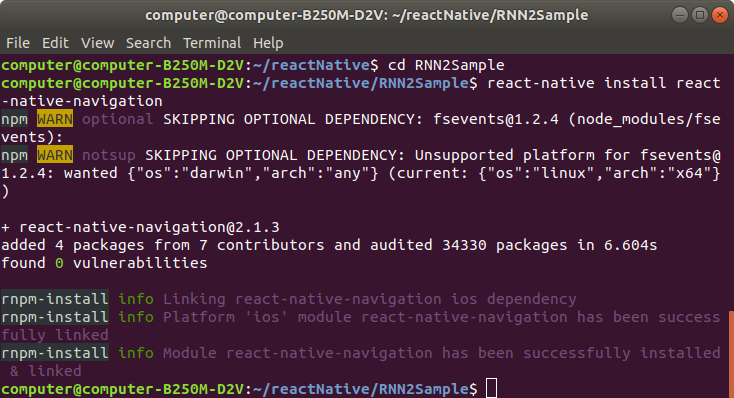
Step 2: cd to the project folder and install react-native-navigation. Refer the below terminal command for that:
$ cd ProjectName
$ react-native install react-native-navigation
Step 3: Android installation. For this, you can follow the instruction in below link
https://wix.github.io/react-native-navigation/#/docs/Installing?id=android
Do as it is said up to step 7.1.
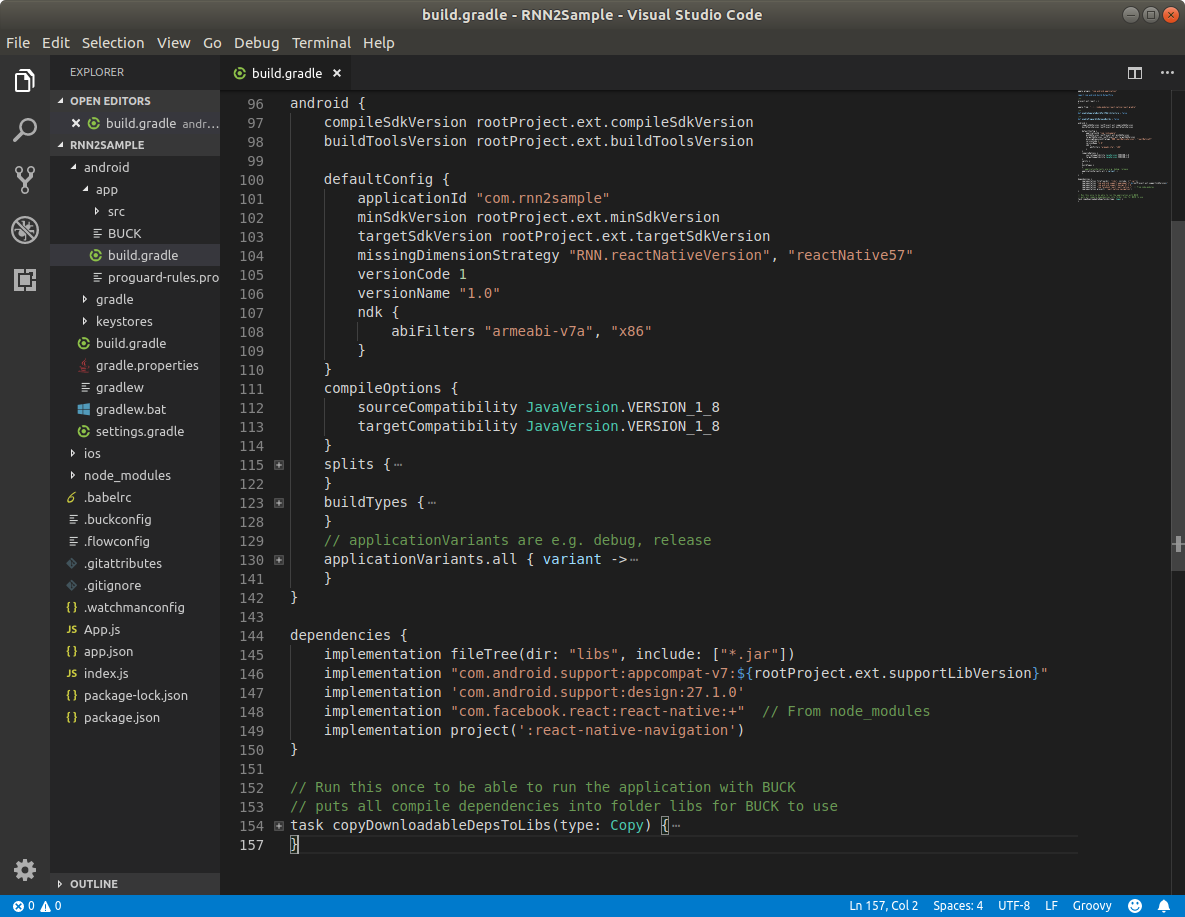
Android gradle is a plugin based build system. so to automate the build as we wish, we can add scripts to build.gradle. addition to the previous steps, you should also edit build.gradle in the app folder add the following dependency to it.
| 1 2 3 4 | Dependencies { ... implementation ‘com.android.support:design:27.1.0’ } |
Thus, things are done for android, next we have can start setting up for ios.
For this, we can follow the link https://wix.github.io/react-native-navigation/#/docs/Installing?id=ios
but before that, as we have automatically linked RNN to this project. We just need to follow step 3 in that manual
Implementation
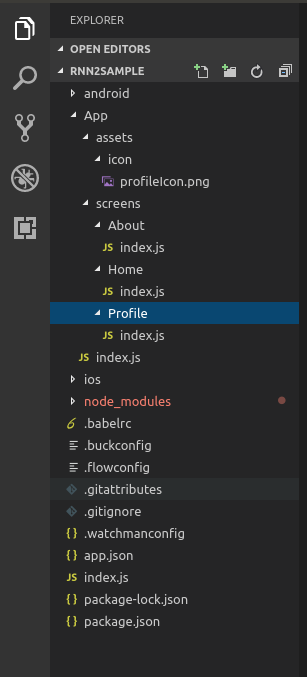
For implementation, I prefer to use an App folder with index.js as base
Here is a screenshot of my folder structure
Now in index.js in App folder, import and register screens and setup a layout
You can refer the below code for that
| 1 2 3 4 5 6 7 8 9 10 11 12 13 14 15 16 17 18 19 20 21 22 23 24 25 26 27 28 29 30 31 32 33 34 35 36 37 38 39 40 41 42 43 44 45 46 47 48 49 50 51 52 53 54 55 56 57 58 59 60 | import { Navigation } from "react-native-navigation"; import Home from './screens/Home'; import About from './screens/About'; import Profile from './screens/Profile'; Navigation.registerComponent('app.HomeScreen', () => Home); Navigation.registerComponent('app.AboutScreen', () => About); Navigation.registerComponent('app.ProfileScreen', () => Profile); Navigation.setRoot({ root: { sideMenu: { left: { component: { name: 'app.ProfileScreen', }, }, center: { bottomTabs: { children: [ { component: { name: 'app.AboutScreen', options: { bottomTab: { fontSize: 12, textColor: '#85c1e9', iconColor: '#85c1e9', selectedIconColor: '#1b4f72', selectedTextColor: '#1b4f72', text: 'Home', icon: require('./assets/icon/profileIcon.png') } } } }, { component: { name: 'app.HomeScreen', options: { bottomTab: { fontSize: 12, textColor: '#85c1e9', iconColor: '#85c1e9', selectedIconColor: '#1b4f72', selectedTextColor: '#1b4f72', text: 'About', icon: require('./assets/icon/profileIcon.png') } } } } ], } } } } }); |
You can refer our repo for codes: https://bitbucket.org/2hatslogic/rnn2sample/
Build your amazing apps now!
Got stuck reach us for all types of react native development services.


Related Articles