Greetings! I'm Aneesh Sreedharan, CEO of 2Hats Logic Solutions. At 2Hats Logic Solutions, we are dedicated to providing technical expertise and resolving your concerns in the world of technology. Our blog page serves as a resource where we share insights and experiences, offering valuable perspectives on your queries.
Since Laravel Vapor is serverless you cannot store files directly in the filesystem. All files should be stored in a cloud storage system, such as AWS S3. You can use the Vapor application to store the file in AWS S3 by adding the storage key as the S3 bucket name to the environment’s vapor.yml configuration.
[code lang=”js”]id: 3958
name: vapor-example
environments:
Production:
storage: vapor-blog
build:
– ‘composer install –no-dev’
– ‘php artisan event:cache’
– ‘npm ci && npm run prod && rm -rf node_modules’
deploy:
– ‘php artisan migrate –force’
On deploying if the bucket doesn’t exist in S3, Vapor will create a new bucket and configure it.

File Uploads
For file uploads, the Laravel Vapor documentation says to use Vapor’s NPM package includes a Vapor. store helper. I tried to use the Vapor. store helper package but was having trouble using this package. My console was giving an error like the Vapor command not found. I spent many hours fixing this but was unsuccessful. So we looked for alternative approaches.
Let’s see how I implemented a CSV file upload and converted it to an array in Vapor.
First I added these two routes to the route.php file
[code lang=”js”]Route::get(‘/upload’, function () {
return view(‘upload’);
});
Route::post(‘/upload’, ‘UploadController@store’);
[/code]The upload view form part in the upload.blade.php file is given below
[code lang=”html”]<form method=”post” enctype=”multipart/form-data”>
{{csrf_field()}}
<div class=”form-group”>
<label for=”exampleInputFile”>File input</label>
<input type=”file” id=”exampleInputFile” name=”input_file”>
Upload CSV File.
</div>
<button type=”submit” class=”btn btn-default”>Submit</button>
</form>
Now let’s look at the all-important upload Controller that we will describe.
Here is the store method in the UploadController.php
[code lang=”php”]/**
* Stores the file and convert to array
* @param Request $request
* @return dumped data
*/
public function store(Request $request)
{
$fileName = date(“m-d-y-H-i-s”) . ‘.csv’;
$path = $request->file(‘input_file’)->storeAs(‘uploads’, $fileName);
$items = $this->processCsv($path);
dd($items);
}
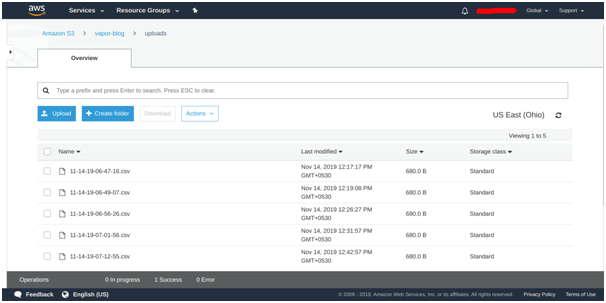
The first 2 lines in-store method create a unique random file name and store the files in the uploads folder of the S3 bucket with the generated file name. This is the only code needed to upload the file in the S3 bucket. When the code is deployed with the storage key as the bucket name, Vapor configures the default file driver as S3. So when the stories method is used the file automatically gets placed in the S3 bucket.
Note:
But when you try in your local file system the file only gets placed in the storage directory since the local file system may have the default driver as ‘local’. You can configure your ‘.env’ file with the AWS configurations and default filesystem as S3 if you want to place the file in the S3 bucket locally.
Now let’s look at how to process the CSV file that we stored in the S3 bucket in the processes function.
/**
* Process Csv File and convert to an array
* @param string $path
* @return array
*/
public function processCsv(string $path)
{
if (!Storage::exists($path)) {
return false;
}
$csvFile = Storage::get($path);
$csvData = $this->convertCsvToArray($csvFile);
return $csvData;
}
This function checks if the file exists in the file system then gets the file contents and passes it to the ‘convertCsvToArray’ function which is defined below.
[code lang=”php”]/*** Convert csv data to array
* @param string $csvFile
* @param string|null $header
* @param array $data
* @return array
*/
public function convertCsvToArray(string $csvFile, string $header = null, array $data = [])
{
$csvData = str_getcsv($csvFile, “\n”);
foreach ($csvData as $row) {
$row = str_getcsv($row, “,”);
if (!$header) {
$header = $row;
continue;
}
$data[] = array_combine($header, $row);
}
return $data;
}
[/code]
The function uses ‘str_getcsv’ PHP function which parse a CSV string into an array. I have previously used ‘fgetcsv’ PHP function which gets line from file pointer and parse for CSV fields. But ‘fgetcsv’ cannot be used here since it requires ‘fopen’ to open the file from the local file system which will not exist when Vapor is used.
First, the ‘str_getcsv’ function parses the CSV string using line breaks and converts it to an array with array elements as CSV rows. Then it loops each row and parses the string to the array as columns. The function then combines the header and row making it an associative array with the key as the header and the value as the column value.
The output array will look like the following
array:6 [▼
0 => array:6 [▼
“Serial #” => “11122203”
“Asset Tag #” => “”
“Hardware Standard” => “”
“Tech Spec” => “2.4GHz/5GHz”
“Current Status” => “test
“Date Modified” => “08/16/2019”
]1 => array:6 [▼
“Serial #” => “SERHPT12345”
“Asset Tag #” => “”
“Hardware Standard” => “Lenovo – Lenovo Tab 4.8+”
“Tech Spec” => “A1395 / 32GB / Wi-Fi”
“Current Status” => “test”
“Date Modified” => “08/19/2019″
]2 => array:6 [▶]3 => array:6 [▶]4 => array:6 [▶]5 => array:6 [▶]][/code]
You can then parse the array to a database for further processing.
The whole UploadController.php will look like the following
namespace App\Http\Controllers;
use Illuminate\Http\Request;
use Storage;
class UploadController extends Controller
{
/**
* Stores the file and convert to array
* @param Request $request
* @return dumped data
*/
public function store(Request $request)
{
$fileName = date(“m-d-y-H-i-s”) . ‘.csv’;
$path = $request->file(‘input_file’)->storeAs(‘uploads’, $fileName);
$items = $this->processCsv($path);
dd($items);
}
/**
* Process Csv File and convert to an array
* @param string $path
* @return array
*/
public function processCsv(string $path)
{
if (!Storage::exists($path)) {
return false;
}
$csvFile = Storage::get($path);
$csvData = $this->convertCsvToArray($csvFile);
return $csvData;
}
/**
* Convert csv data to array
* @param string $csvFile
* @param string|null $header
* @param array $data
* @return array
*/
public function convertCsvToArray(string $csvFile, string $header = null, array $data = [])
{
$csvData = str_getcsv($csvFile, “\n”);
foreach ($csvData as $row) {
$row = str_getcsv($row, “,”);
if (!$header) {
$header = $row;
continue;
}
$data[] = array_combine($header, $row);
}
return $data;
}
}
[/code]
These were some of the issues our Laravel Developers came across while working with Vapor.
Conclusion: Overcoming Challenges with Laravel Vapor File Uploads
In this comprehensive guide, we explored the intricacies of file uploads in Laravel Vapor, a serverless framework that relies on cloud storage, particularly AWS S3. Leveraging Vapor’s seamless integration with cloud services and its unique storage configuration, we unveiled best practices for efficient file handling.
Despite Vapor’s recommendation to use the Vapor NPM package, we delved into an alternative approach for file uploads due to challenges with the Vapor CLI. Our solution involved implementing a CSV file upload and transforming it into an array within Vapor.
Key Takeaways and Best Practices:
- Direct File Upload with Vapor: Utilize Vapor’s storage configuration to seamlessly upload files directly to AWS S3.
- Vapor Environments and Configurations: Manage file uploads effortlessly across different Vapor environments by configuring the storage key in vapor.yml.
- File Validation and Security: Ensure uploaded files meet specific criteria, and implement necessary security measures to protect sensitive data.
- Multipart Upload and Vapor Queues: Handle large files efficiently through multipart upload, and explore Vapor queues for asynchronous file processing.
- Middleware and Signed URLs: Implement Laravel middleware for robust file upload requests, and secure file access with signed URLs.
- AWS Lambda Integration and Vapor Events: Explore AWS Lambda integration for enhanced file processing capabilities, and leverage Vapor events to handle file upload-related events.
- File Permissions and Laravel Filesystem: Manage file permissions effectively, and understand Laravel’s filesystem abstraction for seamless file storage.
In the journey outlined in this blog post, we encountered and addressed challenges, providing insights into the implementation of a robust file upload system in Laravel Vapor. By following these best practices and leveraging the power of Vapor, developers can streamline file uploads and enhance the overall efficiency of their applications. You can hire Laravel developers for expert solutions or consult with Laravel development services.


Related Articles